If you’ve been looking for solutions to get Stripe work on your WordPress website without purchasing a SSL certification…
You stoped at the right place!
If you are a small business operator, paying for SSL or other premium plugins can be a little stressful for new start-ups especially with a low budget…

Without further ado…let’s straight cut to the point:
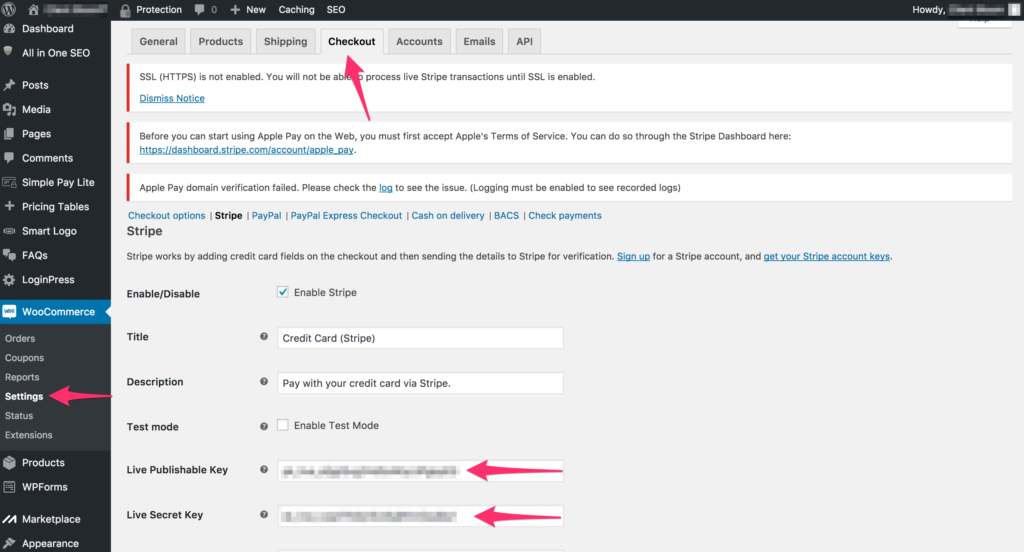
Signing up for a Stripe account is totally free, 2.9% + 30¢ transaction fee sounds acceptable. However, if you want to use Stripe as your payment option on your site (like a button or something) you must purchase a SSL (HTTPS) from your host or you will get notification on your backend that looks like this:
SSL (HTTPS) is not enabled. You will not be able to process live Stripe transactions until SSL is enabled.
The solution we discovered is quite simple and will get you a FREE SSL on your Woocommerce site with full functionality of Stripe payment gateway. Most importantly, NO CODING REQUIRED!
Follow these 5 easy steps and feel free to leave a comment or contact us, we will be happy to help you out.

Step 1: Install and Activate Plugins
There are 4 FREE plugins we need for this solution:
- Woocommerce
- WooCommerce Stripe Gateway by Automattic
- CloudFlare by Ian Pye
- CloudFlare Flexible SSL by iControlWP
You can either download the plugins and upload them to your WordPress or go to your WordPress Admin, click “Plugins” -> “Add New” then search the names.
Step 2: Register and Set up a Stripe Account
Create your Stripe Account here.

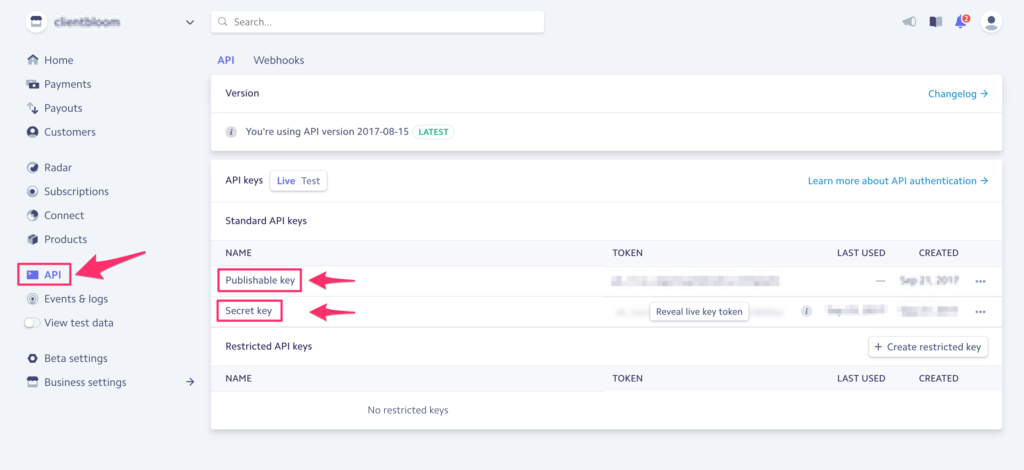
Once you’re done with signing up your Stripe account, go to your dashboard (or click your account name on the top right corner), click API on the left menu section, save both “Publishable key” and “Secret key”
Step 3: Link Stripe and WooCommerce
- Head into your WordPress dashboard on the left-hand side and find woo commerce > settings
- From the navigation bar on the top select checkout
- Check the box that says “Force HTTP when leaving the checkout”. (That keeps the rest of the site at HTTP and just the checkout pages at HTTPS.)
- Select Stripe from the checkout options
- Enable Stripe and make sure you have the following fields filled out: Live Secret Key, Live Publishable Key, uncheck Enable Test Mode, Capture: Capture card immediately enabled, Saved Cards: Enable payment via Saved Cards Enabled.
- Hit Save Changes
Step 4. Register and Set Up Cloudflare
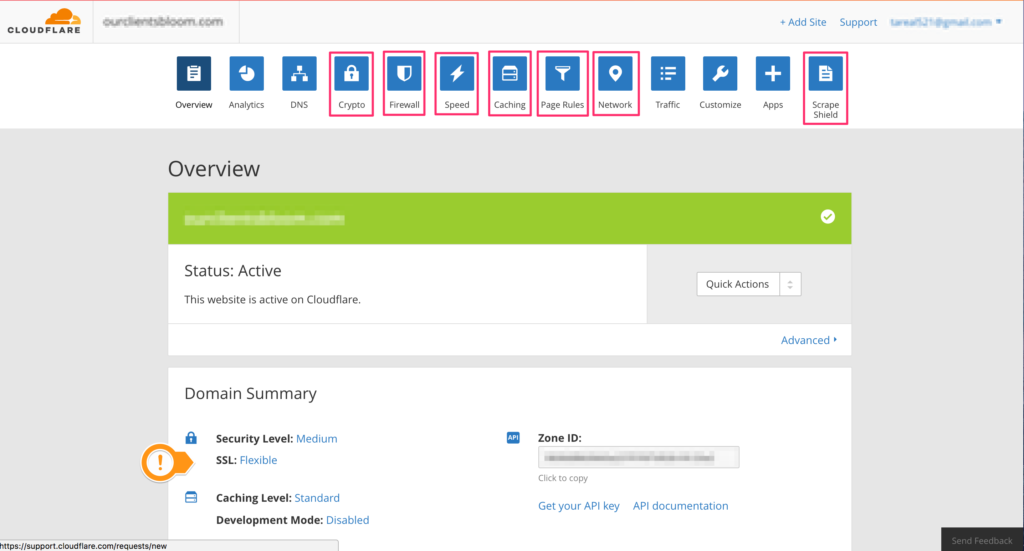
Sign up for CloudFlare here and follow the setup guide. (this will also make your site faster! AWESOME!) Once you have your CloudFlare setup follow the next steps to make sure it’s ready for your SSL. (note: the following work with my server setup and should work with yours, if you’re having trouble you may need to alter some settings)
- Crypto Tab – Set the following options SSL: Flexible
- Firewall Tab – Security Level: Medium
- Speed Tab – Auto Minify: All Selected, Rocket Loader: Off (very important)
- Caching Tab – Caching Level: Standard, Cache Expiration: 4 Hours, Always Online: On
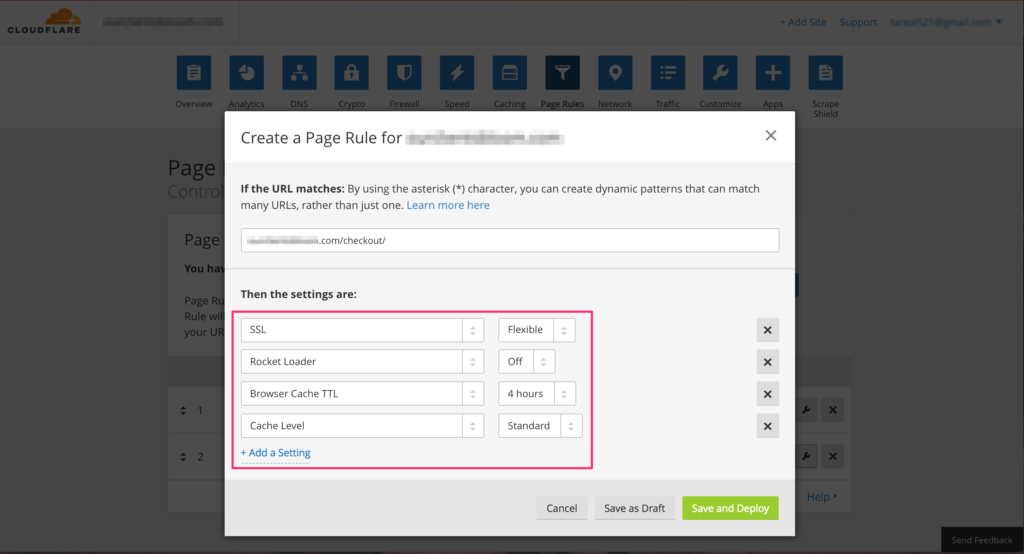
- Page Rules – See image… Make sure yourdomain.com/checkout/ has SSL: Flexible, Rocket Loader Off
- Network – Websockets: On, IP Geolocation: On
- Scrape Shield – Email Address Obfuscation: On, Server-side Excludes: On.
If you don’t have the settings, simply click “+Add a Setting” and make sure the final settings look like this:
Step 5: Set up CloudFlare WordPress Plugin
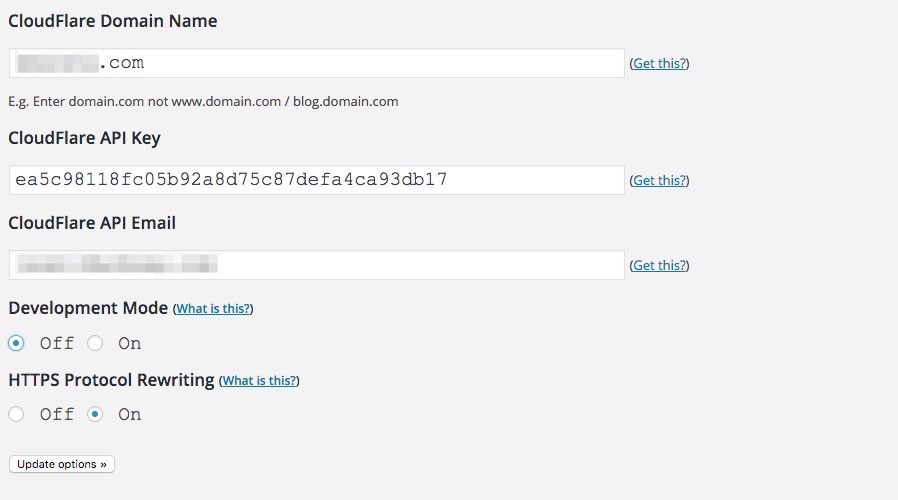
- In your WordPress backend navigate to Settings > Cloudflare on the left-hand side bar.
- Input your domain name as it is registered with Cloudflare,
- Input your Cloudflare API Key (which can be found in Cloudflare dashboard Overview “Get your API key” > API KEY > View Global API KEY)
- Your Cloudflare Email address.
- Turn on HTTPS Protocol Rewriting
CONGRATULATIONS, YOU ARE DONE!
Your website should be able to take credit card payments over SSL + Stripe at no additional cost of plugins, or paying your host for an SSL.

*Note: it may take up to 24 hours (usually a lot faster) for Cloudflare settings to become active, so just be patient with it.
If you have any questions or issues, feel free to reach out to us and we are happy to help! 🙂
Stay tuned!